
Cleaning a Rifle: How Often, How Much and How to Protect the Bore
Joseph McLain Nov 07, 2026
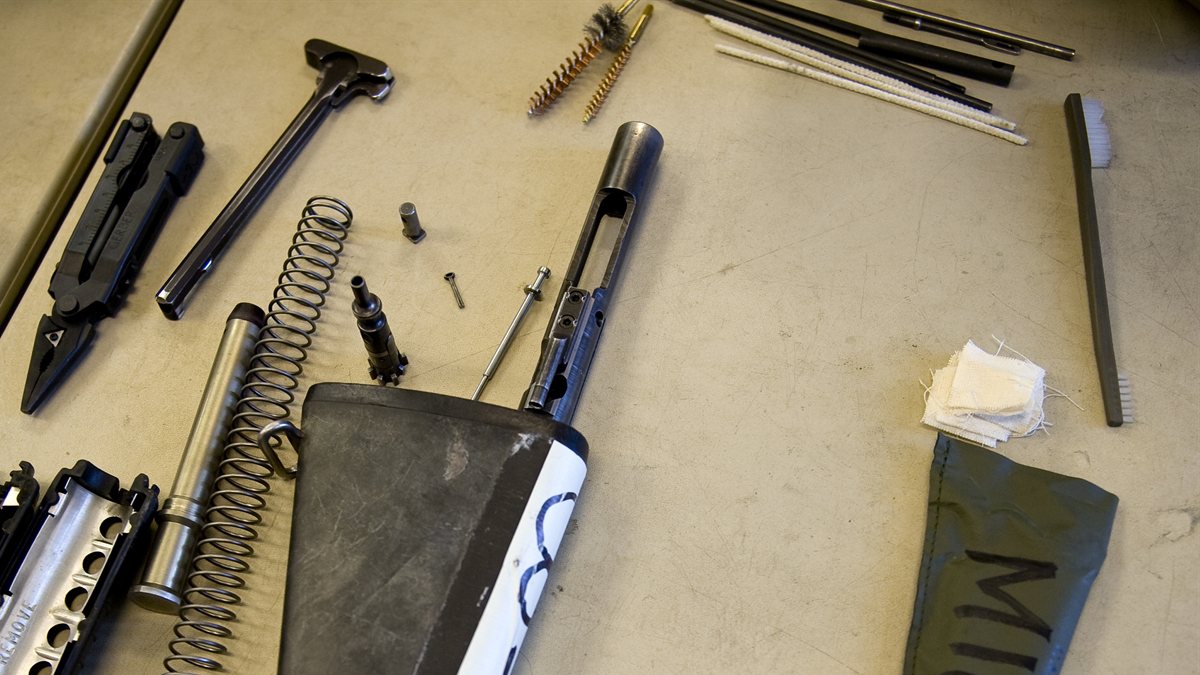
You just got home from the range, and the rifle is sitting in its case smelling of powder. Some shooters clean a deer rifle until the patches come out white after every outing; some long-range shooters barely clean their barrels and find they shoot better dirty. The cleaning kit you bought came with brushes, jags, solvents and a rod in three pieces, and no clear instructions. Both habits have something right in them: a rifle needs care, but more scrubbing isn't always better, and the wrong technique can do more harm than the fouling.
Cleaning a rifle is really about two goals. The first is keeping the rifle reliable and protected from rust. The second is keeping the bore in the condition where it shoots most accurately, which is not always perfectly clean. Once you understand what builds up in a barrel and what actually damages one, the right routine becomes much simpler.
By the end you should understand what fouling is, how often to clean for the way you use the rifle, which tools matter and how different actions change the routine, so you can decide when your rifle needs cleaning, clean it without damaging it and know what to expect from the first shots afterward.
What builds up in a barrel
Every shot leaves something behind. Burned powder leaves carbon, a dark, sooty residue that builds up in the bore and the chamber. Bullets leave a thin layer of their jacket material, usually copper, on the rifling as they are pressed through it. Rimfire and some cast bullets leave lead. Old military surplus ammunition with corrosive primers leaves salts that attract moisture and cause rust quickly.
Not all of that is bad. A thin, even layer of fouling often helps a barrel shoot consistently, because each bullet meets the same surface. That is why many rifles shoot their first one or two shots from a freshly cleaned barrel to a slightly different place, and then settle down. Problems start when fouling builds up unevenly, when copper accumulates enough to affect accuracy, or when moisture gets under the fouling and starts rust.
Think of it like a cast-iron skillet. A seasoned skillet cooks better than a bare one, but a skillet caked with burned food does not. The goal is a well-kept surface, not a stripped one.
Clean to prevent rust and buildup that hurts accuracy, not to make the bore look new after every outing.
How often to clean
The right schedule depends on how you use the rifle.
- Hunting rifles. Clean thoroughly after the season, and after any day in rain or snow, then confirm your zero with a fouling shot or two before the next hunt.
- Range and target rifles. Clean when accuracy starts to fall off or on a round-count schedule you have found works for that barrel, often every few hundred rounds.
- AR-15s and other semi-autos. Keep the action and bolt clean and lubricated regularly, and clean the barrel less often than the action.
- Rimfires. Clean when accuracy or function drops, since .22 barrels often shoot best with some fouling.
- After corrosive ammunition. Clean the same day, every time, because the salts left behind will rust the bore and action.
- Before storage. Clean and protect any rifle that will sit for months, especially in a humid basement or vehicle.
Of these, the after-the-season cleaning and the same-day cleaning after corrosive ammunition do the most to protect a rifle, because rust does far more damage than any normal amount of fouling. The other schedules are about accuracy and reliability, and you can adjust them by watching your groups. If your rifle starts throwing wider groups than usual, our article on why your rifle groups are big helps you decide whether fouling is really the cause.
Key idea: Rust and damage from careless cleaning both ruin barrels. Normal fouling rarely does. A barrel cleaned gently when it needs it will outlast one scrubbed hard after every trip.
Clean after wet days, after the season, before storage and immediately after corrosive ammunition. Otherwise, let your rifle's accuracy tell you when.
The tools that matter
A good cleaning job depends more on a few right tools than on a big kit.
- One-piece cleaning rod. A coated or carbon fiber one-piece rod flexes less and collects less grit than a jointed rod, which can rub the bore at each joint.
- Bore guide. This sleeve slides into the action in place of the bolt and keeps the rod centered, protecting the chamber and throat.
- Jag and patches. A jag pushes a snug cloth patch through the bore to carry solvent in and fouling out.
- Bore brush. A bronze or nylon brush scrubs loosened fouling, and bronze is gentle enough for steel barrels.
- Solvent and oil. A general bore solvent handles carbon, a copper solvent handles copper fouling, and a light gun oil protects the bore afterward.
- Pull-through cord. A cord with a built-in brush is handy in the field and for actions you cannot clean from the breech.
Of these, the bore guide and a quality one-piece rod do the most to protect your barrel. The rifling near the chamber, called the throat, and the very end of the barrel, called the crown, are the two areas that most affect accuracy. A rod rubbing against either of them, carrying grit with it, wears them in a way no fouling ever will.
Common mistake: Leaving a strong copper solvent in the bore overnight or mixing solvents in the barrel. Many copper solvents contain ammonia, which can damage steel if left too long, and some solvents react with each other. Follow each product's directions for time, rinse it out and use one product at a time.
Buy a one-piece rod, a bore guide that fits your rifle, the right jag and brush for your caliber and solvents you understand. Skip the gadgets until you need them.
Step by step: Cleaning a bolt-action rifle
A bolt-action rifle is the easiest to clean well, because the bolt comes out and you can clean from the chamber end, which is the right direction for the bore.
Start by making sure the rifle is unloaded. Remove the magazine or empty it, open the bolt, look and feel to confirm the chamber is empty, and put all ammunition in another room. Work in a ventilated area with eye protection and gloves, since solvents are harsh on skin and eyes. Remove the bolt and set the rifle in a cradle or on a padded surface, muzzle pointed down slightly so solvent drains away from the action.
Insert the bore guide, then push a patch wet with bore solvent through from the chamber end and out the muzzle. Push it all the way through, then remove the patch before pulling the rod back. Pulling a dirty patch back through just drags the fouling with it. Give the solvent a few minutes to work, as the product directs. Then make several passes with the brush, always pushing all the way out of the muzzle before pulling back, so the brush does not reverse direction inside the bore. Follow with wet patches, then dry patches, until they come out reasonably clean.
If you see blue or green on the patches after the carbon is gone, that is copper. Use a copper solvent according to its directions, then rinse it out with your regular solvent and dry patches. Finish with a patch lightly wetted with gun oil if the rifle will be stored, or a dry patch if you will shoot it soon. Wipe the bolt, clean the bolt face, and put a light film of oil on the lug surfaces and the outside of the rifle to protect against fingerprints and moisture.
Good practice: Before you shoot a rifle you oiled for storage, run a dry patch through the bore. A wet bore can send the first shot to a different spot, and that is the shot that matters most when hunting.
Clean from the breech with a bore guide, push each patch and brush all the way through before reversing, and finish with protection that matches whether the rifle will be stored or shot.
Other actions: Lever, semi-auto and rimfire
Not every rifle lets you clean from the breech. Lever actions and many semi-automatic rimfires, such as the Ruger 10/22, do not allow you to remove the bolt easily. For these, a pull-through cord inserted from the chamber end is often the gentlest option. If you must use a rod from the muzzle, use a muzzle guide to keep the rod centered and away from the crown, and go slowly.
The AR-15 can be cleaned from the breech once you separate the halves and remove the bolt carrier group. Its bigger maintenance job is the bolt carrier group itself, which collects carbon from the gas system. Scrape carbon from the bolt tail and the inside of the carrier, clean the bolt face and extractor, and lubricate generously before you shoot. Our article on how an AR-15 works explains why that lubrication matters so much.
For any action, the owner's manual is the authority on disassembly. Do not take apart triggers or fire control groups for routine cleaning. If a rifle needs that level of service, or if something does not reassemble the way it came apart, have a qualified gunsmith look at it.
Clean from the breech whenever the design allows. When it does not, use a pull-through or a muzzle guide and protect the crown above all else.
After cleaning: Fouling shots and checking zero
A freshly cleaned barrel often sends its first shot or two to a slightly different spot than a fouled barrel. The difference may be small, but for a hunter it is the shot that counts. After any thorough cleaning, fire one or two fouling shots and confirm your zero before you hunt.
That is also why many hunters clean right after the season rather than right before it. The rifle goes into storage protected, then gets a dry patch, a couple of fouling shots and a zero check before opening day. A new rifle or new barrel may follow a different routine for its first rounds, which our article on breaking in a rifle explains.
Storage matters as much as cleaning. A clean, oiled rifle can still rust in a damp case or a humid basement. Store rifles out of foam-lined cases that trap moisture, in a dry place, and check them occasionally. Our article on preventing rust in storage covers humidity control in detail.
Clean after the season, store dry and protected, and fire fouling shots and confirm zero before you hunt.
Cleaning your rifle and noting the result
One careful cleaning, followed by one range trip, teaches you your rifle's habits. With the rifle confirmed unloaded by look and feel, ammunition in another room, a ventilated space, eye protection and gloves, remove the bolt if the action allows, insert a bore guide and push a solvent-wet patch through from the breech. Brush with full passes out the muzzle, then patch until the patches come out reasonably clean, watching for blue or green copper color. A lightly oiled patch suits storage and a dry one suits shooting, and the bolt and exterior get a wipe-down. At the next range trip, with eye and ear protection, note where the first two shots land compared with later groups: that tells you how many fouling shots your rifle needs before it settles.
Putting it together
Rifle cleaning is about protection and consistency, not perfection. Fouling builds up with every shot, and a little of it often helps accuracy. Rust and damage to the throat or crown are the real threats. Clean when the rifle needs it: After wet days, after the season, before storage and immediately after corrosive ammunition. Use a one-piece rod and a bore guide, clean from the breech when you can, push everything all the way through before pulling back and follow each solvent's directions. Then fire a fouling shot or two and confirm zero before it matters.
Cleaning after every trip protects a rifle from rust, and cleaning less often keeps some barrels shooting consistently. With a careful method, you get the benefits of both.
Check your understanding
Try answering these before you open the answer. If you can decide what to do and explain why, you have it.
1. You shot a box of surplus ammunition with corrosive primers on Saturday. You plan to clean the rifle next weekend. What could happen?
The salts left by corrosive primers attract moisture and can start rust in the bore and action within a day or two. Clean the rifle the same day, following the ammunition maker's or rifle maker's guidance for corrosive residue, then dry and oil it.
2. You're careful with your cleaning rod, so a friend says a bore guide is a waste of money. Why is it still worth using?
It keeps the rod centered as it enters the chamber and throat, so the rod and any grit on it don't rub the rifling. The throat strongly affects accuracy, and wear there is permanent, however careful you are.
3. You cleaned your deer rifle the night before opening day. What should you have done differently?
Clean it after the season instead, or at least well before the hunt, then fire a fouling shot or two and confirm the zero. A freshly cleaned barrel can send the first shot to a slightly different spot, and that is the shot that matters.
4. After the carbon is gone, your patches still come out blue-green. What does that tell you, and what do you do?
That is copper fouling from bullet jackets. Use a copper solvent according to its directions, without leaving it in the bore longer than directed or mixing it with other solvents, then clean it out and dry or oil the bore.
5. You cannot remove the bolt on your lever gun. How do you clean the bore without damaging the crown?
Use a pull-through cord from the chamber end, or a rod from the muzzle with a muzzle guide to keep it centered. Go slowly and avoid letting the rod rub on the crown.
Where to go next
For storage after cleaning, our article on preventing rust in storage explains how humidity and cases affect your rifle. For handguns and shotguns as well as rifles, see our general guide to cleaning and maintaining a firearm. If you have a new rifle, read breaking in a rifle before your first cleaning. And if your groups are still wide after a careful cleaning, why your rifle groups are big walks through the other causes.
If this article helped you, we invite you to sign up for email notifications of new blog articles.